首頁
» 如何
»
How to Clean a Dry-Erase Board Eraser: Best Method by Eraser Type
How to Clean a Dry-Erase Board Eraser: Best Method by Eraser Type
A dry-erase eraser usually does not stop working all at once. The more common sign is that it begins moving old marker residue around instead of lifting it cleanly. The right fix depends on what the erasing surface is made of and how it is attached. A washable microfiber pad can be rinsed; a reversible felt pad may simply need to be flipped; a cloth-style eraser may be machine washable; and an unknown fixed felt or foam block may be safer to clean dry or replace rather than soak.
That distinction is backed by current manufacturer guidance. Quartet says that when an eraser starts spreading residue, its microfiber cloth can be washed with water and left to dry before reuse; if washing does not improve performance, replacement is appropriate. Quartet also sells erasers with reversible felt pads and a separate microfiber surface, which shows why “all erasers are the same” is not a safe assumption. 3M's Post-it Dry Erase Cleaning Cloth is explicitly washable and machine washable, while 3M's Flex Write Surface documentation recommends microfiber rather than a standard whiteboard eraser on that specific writing surface.
Bottom line: there is no single best cleaning method for every eraser. The best choice is the least aggressive method that matches the eraser's construction and your board surface.
Quick comparison: which cleaning method should you choose?
Method
Best for
Advantages
Trade-offs
Flip a reversible pad
Erasers designed with two felt faces
Fast, dry, no waiting
Does not remove built-up ink; only works on supported designs
Water wash
Manufacturer-approved microfiber pads or cloths
Manufacturer-backed for residue removal; no harsh chemicals needed
Requires complete drying before reuse
Dry brush or gentle dust removal
Unknown fixed felt or foam when washability is unclear
Low moisture risk
May not remove deeply embedded residue
Machine wash
Only cloth-style products specifically labeled machine washable
Convenient and thorough for washable cloth
Not appropriate for an eraser block with a handle, magnets, adhesives, or unknown construction
Replace the eraser or pad
Worn, matted, damaged, or still-smearing erasers after cleaning
Restores predictable performance
Costs more and creates more waste than successful cleaning
How to clean a dry-erase board eraser step by step
1. Identify the erasing surface before adding water
Look at the bottom of the eraser and any product label. Is the working surface microfiber, felt, foam, or a removable cloth? Does the pad flip over or detach? Quartet's Premium Magnetic 3-in-1 Eraser, for example, uses a reversible felt pad plus a microfiber surface. That construction supports a different maintenance strategy from a single-piece foam eraser.
Start by identifying whether the eraser has a fixed pad, reversible felt, removable microfiber, or another construction before choosing a cleaning method.
Recommendation: if you cannot identify the material or find care instructions, do not submerge the whole eraser. Begin with dry residue removal or replace the pad if the product is designed for that.
2. Choose plain water first for washable microfiber
Quartet's maintenance guidance specifically says to wash the microfiber cloth of an eraser with water to remove ink dust. That makes plain water the most defensible starting point for a known washable microfiber surface. Soap is not a universal requirement in the manufacturer sources checked for this article.
For a washable microfiber pad, plain water is a manufacturer-supported starting point; use detergent only if the product's care instructions permit it.
Trade-off: a mild detergent may help with oily contamination, but it also creates residue that must be rinsed away. If the maker does not call for soap, water alone is the lower-risk choice.
3. Rinse only the part that is approved for washing
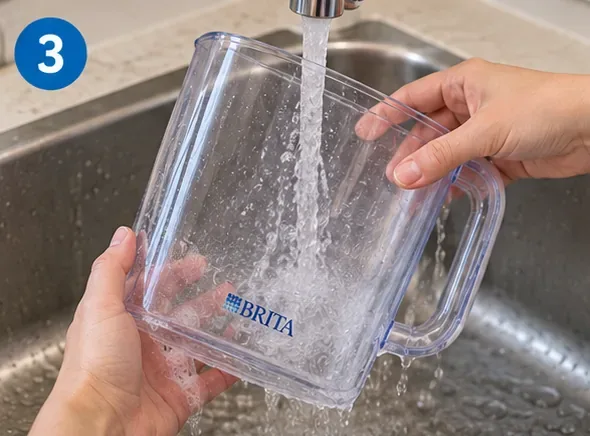
Hold a removable or washable microfiber section under clean water and work out accumulated dry-erase dust gently. Avoid automatically soaking the handle, magnet, plastic body, adhesive layers, or fixed padding. Those parts may not have the same water tolerance as the textile surface.
A washable erasing surface being rinsed under clean water; avoid soaking the entire assembly unless the manufacturer says it is washable.
Recommendation: if your eraser is a fixed block and the manufacturer does not say it can be rinsed, use a dry method instead of assuming the whole assembly is waterproof.
4. Use gentle agitation only when the pad is washable
For a washable textile pad, light finger agitation or a very soft brush can help loosen ink particles. The goal is to free residue, not abrade the fibers. A hard brush can roughen a microfiber surface or distort felt.
Gentle brushing can loosen residue on a washable pad, but stiff brushes and aggressive scrubbing are unnecessary and may damage the erasing surface.
Trade-off: brushing may clean faster than water alone, but it adds mechanical wear. Reserve it for washable material that remains dirty after rinsing.
5. Rinse until no cleaning residue remains
If you used any manufacturer-approved detergent, rinse thoroughly. Even with plain water, continue rinsing until loosened marker dust is no longer washing out. Residue left in the pad can transfer back to the board during the next use.
A final clean-water rinse removes loosened marker dust and any approved cleaning solution from the washable pad.