How to Mount a Remote SSHFS Directory Automatically at Boot in Debian

To mount a remote SSHFS directory automatically in Debian, configure noninteractive SSH authentication and add an SSHFS entry to /etc/fstab. With systemd, you can either connect during boot or activate an automount at boot and connect when the directory is first accessed. The second approach is useful when the remote server or network may be unavailable during startup.

This reference uses Debian 13 “trixie” documentation reviewed on October 9, 2026, including SSHFS 3.7.3 and systemd 257 documentation. The commands are configuration examples, not results from a tested deployment. Check your installed manuals if you use another release.

Choose when the SSHFS connection should start

RequirementConfiguration choiceExpected behavior
Make the directory available on demand after bootUse x-systemd.automountThe first access triggers the remote mount.
Attempt the remote connection during bootOmit x-systemd.automountsystemd starts the mount as part of startup.
Allow startup to continue if storage is unavailableUse nofailThe mount is not a required boot dependency.
An application must wait for this storageAdd a dependency to that application’s serviceThe application starts only after the mount succeeds.

The main example uses an on-demand mount. The distinction matters: an active automount does not mean an SSHFS connection already exists. See Debian’s systemd automount manual for the relationship between the automount and its matching mount unit.

Before you start

  • The Debian client uses systemd and you have sudo access.
  • The remote account supports SFTP and can access the intended directory.
  • The client can reach the remote host, including any required VPN or jump host.
  • You have a way to verify the remote server’s SSH host-key fingerprint.
  • The local mount point is empty and is not a critical system directory.

Replace files@storage.example.net:/srv/data with your remote username, hostname, and directory. The hostname is a placeholder. The local mount point is /mnt/remote; the dedicated key is /root/.ssh/sshfs_boot.

This is an administrator-managed system mount. It runs locally as root but logs into the remote server as files, not remote root. The SSHFS project documentation generally recommends running ordinary interactive mounts as a regular user. A system boot mount requires deliberate credential and access management.

1. Install the client packages

sudo apt update
sudo apt install sshfs openssh-client
sshfs --version
systemctl --version

Install SSHFS on the Debian client. The remote system needs working SFTP service; it does not need an SSHFS installation just to serve files. If package installation fails, resolve the repository or connectivity issue before editing boot configuration.

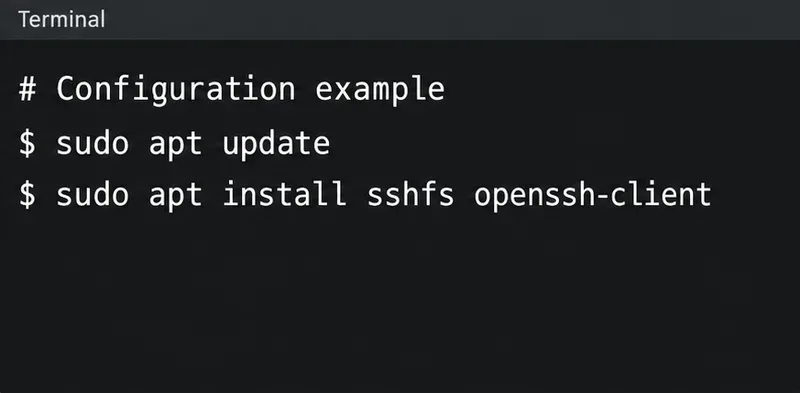
終端機顯示 apt 更新並安裝了 sshfs 和 openssh-client。
Install the SSHFS client and OpenSSH tools on Debian.
2. Prepare the mount point and dedicated key

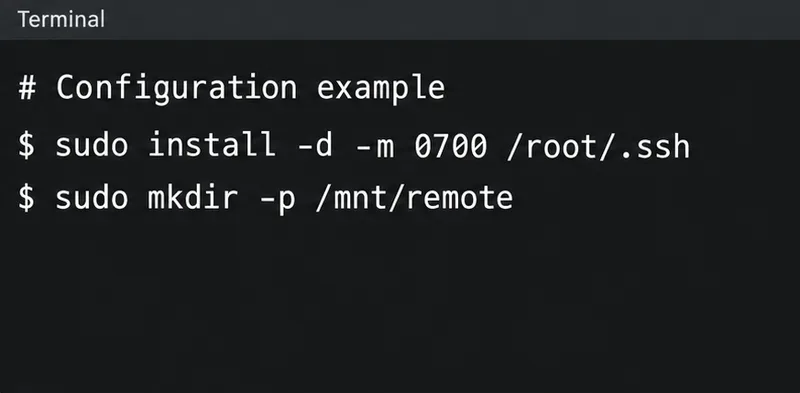
sudo install -d -m 0700 /root/.ssh
sudo mkdir -p /mnt/remote
sudo ssh-keygen -t ed25519 -f /root/.ssh/sshfs_boot -N ''
sudo chmod 0600 /root/.ssh/sshfs_boot

請勿覆蓋該路徑下已存在的金鑰。如有必要,請選擇其他名稱並在下文中保持一致。此無人值守範例中故意設定空密碼:啟動期間無人可以解鎖密鑰。保護客戶端,並僅授予遠端帳戶所需的目錄權限。如果您的策略要求使用加密金鑰,請安排託管的無人值守解鎖機制。

金鑰產生選項的詳細說明請參閱 Debian 的ssh-keygen 手冊。在桌面 SSH 代理程式中解鎖的金鑰不會自動提供給系統掛載點。

終端機顯示已建立 root 使用者的 SSH 目錄和 /mnt/remote 掛載點。
在建立專用啟動金鑰之前,請先準備好本機目錄。

3. 授權金鑰並驗證無人值守 SFTP

sudo ssh-copy-id -i /root/.ssh/sshfs_boot.pub files@storage.example.net

在此連線設定過程中,請在接受連線之前,將顯示的主機金鑰指紋與透過可信任頻道從伺服器管理員取得的值進行比較。該命令以本機 root 使用者身分執行,因此通常的主機金鑰記錄儲存在 root 使用者的 SSH 檔案中。如果伺服器上停用了基於密碼的設置,請管理員安裝公鑰。

接下來,使用與啟動掛載點相同的身分和主機金鑰檔案測試 SFTP:

sudo sftp -i /root/.ssh/sshfs_boot \
  -o IdentitiesOnly=yes -o BatchMode=yes \
  -o StrictHostKeyChecking=yes \
  -o UserKnownHostsFile=/root/.ssh/known_hosts \
  files@storage.example.net

在 SFTP 提示字元下,使用 `--host-key` ls /srv/data,然後執行bye`--host-key`。這應該無需密碼或確認提示即可正常工作。 ` --host-key` 會阻止互動式驗證;明確主機金鑰設定可以保留驗證功能。這些選項在OpenSSH 用戶端設定手冊BatchMode=yes中有定義。

對於非預設端口,請-p 2222配合 ssh-copy-id、-P 2222sftp 和port=2222SSHFS 選項使用。如果需要跳轉主機,也請在 root 使用者的 SSH 環境中設定並測試該路由。

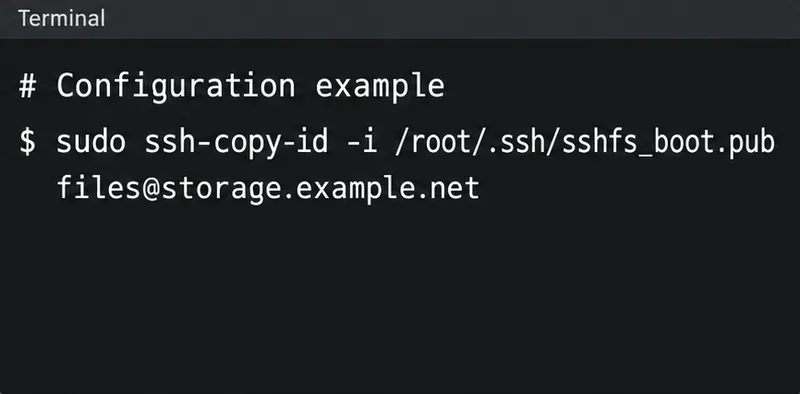
終端機顯示具有專用公鑰和範例遠端帳戶的 ssh-copy-id 命令。
為範例遠端帳戶授權專用公鑰;在設定過程中驗證主機指紋。

4. 驗證手動安裝是否有效

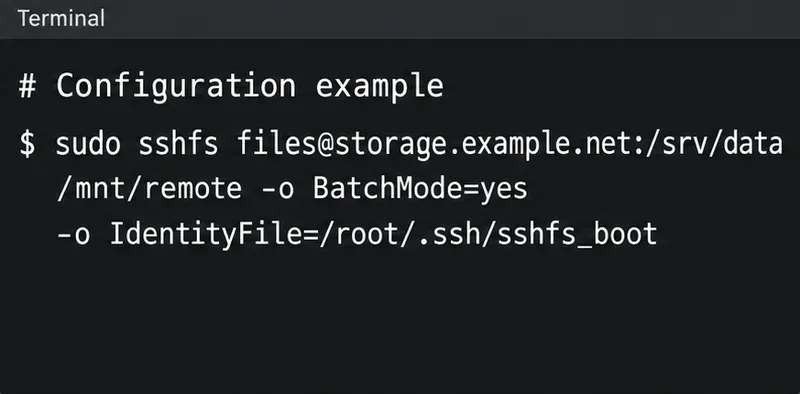
sudo sshfs files@storage.example.net:/srv/data /mnt/remote \
  -o IdentityFile=/root/.ssh/sshfs_boot,IdentitiesOnly=yes,BatchMode=yes \
  -o StrictHostKeyChecking=yes,UserKnownHostsFile=/root/.ssh/known_hosts
sudo ls /mnt/remote
sudo umount /mnt/remote

檢查掛載點是否屬於目標遠端目錄。本範例初始僅允許本機掛載點擁有者 root 使用者訪問,因此請使用 sudo 進行檢查。完成掛載後,在啟動 systemd 管理的設定之前,請先解除安裝目錄。如果目錄正忙,請關閉使用該目錄的 shell 和應用程式。

SSHFS 使用遠端帳戶的權限。客戶端的 root 使用者身分並未授予伺服器額外的權限。在將設定永久生效之前,請先修復身份驗證、SFTP 或遠端路徑錯誤。

終端機顯示一個 SSHFS 命令範例,其中包含遠端路徑、掛載點、批次模式和身分文件。
終端機顯示了一個手動安裝範例;請使用文字中的完整命令和驗證選項。

5. 新增持久性 fstab 條目

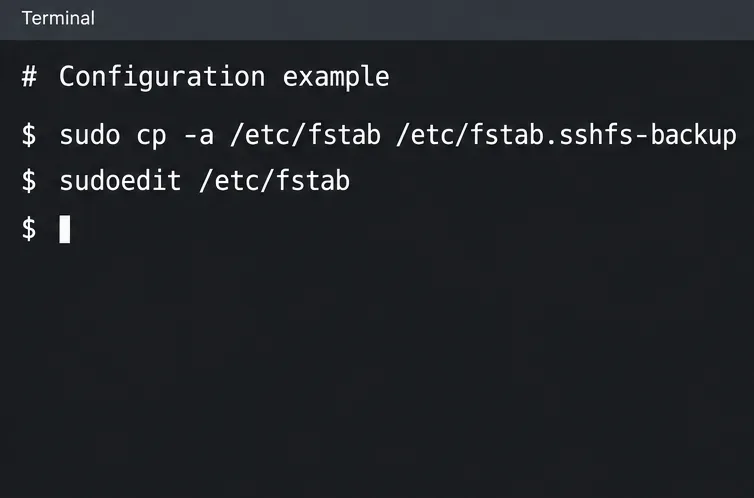
sudo cp -a /etc/fstab /etc/fstab.sshfs-backup
sudoedit /etc/fstab

如果備份檔案已存在,請選擇其他備份檔案名稱。將以下內容作為一行新增到文件中,並替換範例中的伺服器和路徑:

files@storage.example.net:/srv/data /mnt/remote sshfs _netdev,nofail,x-systemd.automount,x-systemd.mount-timeout=30s,IdentityFile=/root/.ssh/sshfs_boot,IdentitiesOnly=yes,BatchMode=yes,StrictHostKeyChecking=yes,UserKnownHostsFile=/root/.ssh/known_hosts,ConnectTimeout=10,reconnect,ServerAliveInterval=15,ServerAliveCountMax=3 0 0

Debian 的SSHFS 手冊sshfs將fstab 檔案系統類型指定為 SSHFS,並接受fuse.sshfsSSHFS 以確保相容性。最後幾個欄位會停用此條目的轉儲和檔案系統檢查調度。如果路徑包含空格,請參閱fstab 格式參考。

選項目的
_netdev將掛載點分類為網路相關。
nofail讓我們在不需要此掛載點的情況下繼續啟動。
x-systemd.automount建立訪問觸發式自動掛載。
x-systemd.mount-timeout=30s限制初始掛載命令的等待時間。
ConnectTimeout=10限制SSH連線建立。
reconnect以及伺服器存活設置幫助偵測斷開的連線並重新連線。

systemd 特有的選項記錄在Debian systemd 掛載手冊中。掛載逾時並非對後續的每個檔案操作都設定了截止時間。

終端機顯示用於備份和編輯 /etc/fstab 的命令。
在新增持久性 SSHFS 條目之前,請備份 fstab 檔案。

6. 重新載入 systemd 並啟用自動掛載

sudo findmnt --verify --verbose
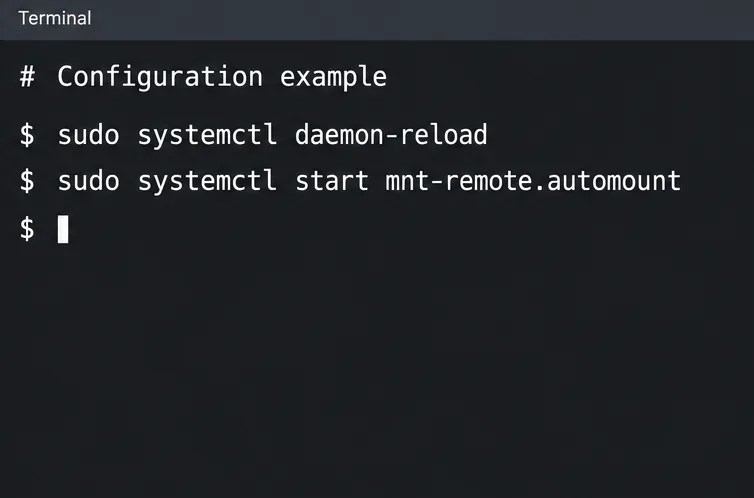
sudo systemctl daemon-reload
sudo systemctl start mnt-remote.automount
systemctl status mnt-remote.automount
sudo ls /mnt/remote
findmnt -t fuse.sshfs

請先查看驗證資訊再繼續。 findmnt手冊中描述了 fstab 驗證;此驗證檢查的是配置,而不是遠端憑證是否有效。存取目錄會執行單獨的連線測試。

上述單元名稱與上述路徑相對應/mnt/remote。對於其他路徑,請使用下列命令取得掛載點名稱systemd-escape --path --suffix=mount /your/path。從 fstab 產生的單元不需要單獨的systemctl enable命令。

如果希望在啟動時嘗試連接,請x-systemd.automount從條目中移除。釋放目錄使用者後,停止其自動掛載和掛載單元,重新載入 systemd,然後啟動符合的掛載單元。nofail如果儲存應保持可選狀態,請保留此項目。

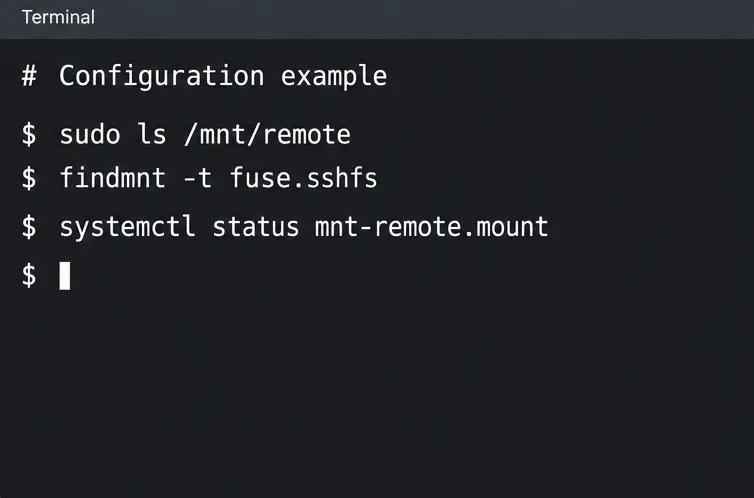
終端機顯示 daemon-reload 並啟動 mnt-remote 自動掛載單元。
重新載入 systemd 並啟動產生的自動掛載單元。

7. 重啟後驗證行為

請在適當的維護時間重新啟動。使用按需配置時,請先檢查自動掛載,然後再存取目錄:

systemctl status mnt-remote.automount
sudo ls /mnt/remote
systemctl status mnt-remote.mount
findmnt -t fuse.sshfs

預期跡象包括啟動後自動掛載以及訪問後實際的 SSHFS 掛載。autofs僅憑一個條目並不能證明遠端文件已連線。需要驗證已知的遠端檔案或目錄,而不僅僅是本機掛載點資料夾是否存在。

如果應用程式必須在啟動前擁有此儲存空間,請在其服務中新增一個包含以下內容的 dropin:

[Unit]
RequiresMountsFor=/mnt/remote

此相依性(已在systemd.unit 檔案中記錄)會拉取並安排必要的掛載點。請重新載入 systemd 並單獨測試該應用程式的啟動。此外,該應用程式還需要相應的本地存取權限。

終端機顯示目錄存取、findmnt 和 mount-unit 狀態命令。
存取該目錄,然後檢查實際的 SSHFS 掛載點及其單元狀態。

8. 依故障類型進行故障排除

sudo journalctl -b -u mnt-remote.mount
sudo journalctl -b -u mnt-remote.automount
症狀下一個
公鑰認證失敗重複執行根上下文 SFTP 測試;檢查所選密鑰和遠端授權。
主機金鑰驗證失敗驗證伺服器指紋和 root 使用者的 known_hosts 條目。在更新密鑰之前,請先調查密鑰是否已更改。
名稱解析或連線失敗檢查 DNS、路由、連接埠存取、VPN 啟動和跳轉主機可用性。
sudo 可以讀取文件,但本機用戶不能。審查FUSE存取策略和所有權映射。
芒特很忙關閉工作目錄或開啟的檔案位於掛載點下的進程。

network-online.target這是一個啟動同步點,並不能保證特定伺服器或 VPN 可存取。 systemd network-online 的說明中描述了這個限制。

對於本機使用者有意存取的情況,請考慮新增 ` allow_other,default_permissions,uid=1000,gid=1000--user-id` 選項,並替換為實際的本機 ID。這將允許掛載點所有者以外的用戶訪問,同時核心權限檢查仍然有效。 UID/GID 選項更改的是掛載點所顯示的權限,而不是伺服器端的權限。 root 掛載點不需要user_allow_other在 fuse.conf 中設定 `--user-id` 選項;此政策允許非 root 掛載點請求更廣泛的存取權限。請參閱FUSE 權限手冊。更改這些選項後,請以預期應用程式使用者的身分重新測試。

修復根本問題後,清除失敗的掛載狀態並重試存取:

sudo systemctl reset-failed mnt-remote.mount
sudo ls /mnt/remote

並非所有應用程式都能透過重新連線實現透明恢復:先前開啟的檔案可能會失效,需要重新開啟。中斷的寫入操作可能會導致資料遺失。如果您的工作負載需要更強的故障保障,請選擇其他儲存方案。

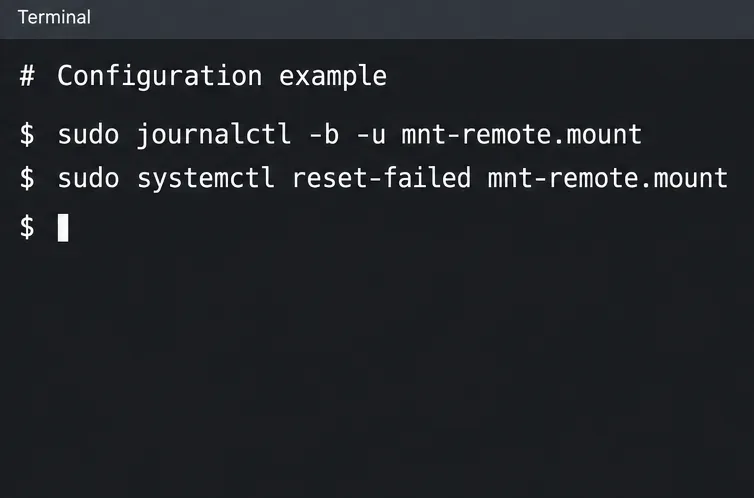
終端機顯示 SSHFS 掛載單元的 journalctl 和 reset-failed 指令。
請先閱讀掛載日誌;修正故障原因後清除故障狀態。

操作清單和回滾

  • 無人值守 SFTP 使用精確的啟動標識。
  • 主機金鑰已驗證並儲存在預期文件中。
  • fstab 條目已解析,但不包含任何密碼或私鑰內容。
  • 重啟後存取可以產生預期的遠端清單。
  • 實際的本機使用者或服務可以讀取所需的檔案。
  • 您了解應用程式如何處理儲存空間不足的情況。

若要停用此配置,請停止使用該目錄的應用程序,停止mnt-remote.automount並mnt-remote.mount移除 fstab 檔案中的此條目,然後執行命令sudo systemctl daemon-reload。保留 fstab 檔案中的其他條目。移除掛載設定不會刪除遠端檔案或撤銷遠端授權金鑰。

留下評論

How to Mount a Remote SSHFS Directory Automatically at Boot in Debian

How to Mount a Remote SSHFS Directory Automatically at Boot in Debian

Configure an SSHFS boot mount in Debian with SSH keys, fstab, and systemd automount. Includes reboot checks, permissions, timeouts, and troubleshooting.

2026年10月臺北、新北種什麼?蔬菜、香草、花卉與每週播種定植清單

2026年10月臺北、新北種什麼?蔬菜、香草、花卉與每週播種定植清單

2026年10月臺北與新北種植指南:依中央氣象署與農業部資料整理蔬菜、香草、草花、直播、育苗、定植與每週工作,並分清氣候常態與短期預報。

2026年你需要了解的播客發展趨勢:新手入門指南

2026年你需要了解的播客發展趨勢:新手入門指南

剛接觸播客?了解 2026 年影響影片、發現、文字稿、人工智慧、分析、獲利以及實用啟動計畫的趨勢。

UGC大師班:打造贏得信任並促成行動的使用者生成內容

UGC大師班:打造贏得信任並促成行動的使用者生成內容

這是一門實用的使用者生成內容 (UGC) 大師班,內容涵蓋客戶和創作者內容的來源、授權、簡報、發布和衡量,同時又不失真實性。

為什麼社群建立是新的行銷方式——以及何時它並非如此

為什麼社群建立是新的行銷方式——以及何時它並非如此

社群建立可以加深信任、提高用戶留存率、收集回饋並增強用戶擁護度,但它並不能取代所有行銷管道。權衡利弊,選擇合適的模式。

Navigating Social Media Algorithm Changes in 2026: What’s Confirmed, Contextual, and Still Unknown

Navigating Social Media Algorithm Changes in 2026: What’s Confirmed, Contextual, and Still Unknown

Learn what major social platforms have actually confirmed about ranking changes in 2026, what depends on context, and how to adapt without chasing myths.

品牌行銷中的真實故事敘述:如何在不顯得刻板的情況下建立信任

品牌行銷中的真實故事敘述:如何在不顯得刻板的情況下建立信任

學習如何運用證據、真實的緊張感、符合倫理的客戶故事和實用的真實性檢驗,使品牌故事聽起來可信、人性化且具體。

第四季電子郵件行銷成功策略:哪些方面需要優先考慮、測試和權衡

第四季電子郵件行銷成功策略:哪些方面需要優先考慮、測試和權衡

透過平衡覆蓋範圍、發送頻率、折扣、自動化、送達率和效果衡量,制定更聰明的第四季電子郵件行銷策略,實現假日季獲利成長。

如何製作高轉換率的短影片:一個實用的框架

如何製作高轉換率的短影片:一個實用的框架

學習如何透過平衡吸引眼球的元素、格式、真實性、行動號召、平台契合度以及在 TikTok、Reels 和 Shorts 等平台上進行測試,來製作能夠帶來轉換的短影片。

The Shift from Influencers to Key Opinion Consumers (KOCs): What Brands Need to Know in 2026

The Shift from Influencers to Key Opinion Consumers (KOCs): What Brands Need to Know in 2026

Why are brands testing KOCs instead of relying only on influencers? Learn what KOCs are, why social commerce favors them, common myths, and how to run a measurable pilot.