如何在 Debian 12 設定 WireGuard 點對點 VPN
為一個遠端客戶端設定 Debian 12 WireGuard VPN 伺服器。設定金鑰、IPv4 轉送、nftables NAT、防火牆存取和連線檢查。
範例場景: Maya 在咖啡館工作時,使用 Debian 12 VPS 作為個人 VPN 端點。她的筆記型電腦應透過加密的 WireGuard 隧道連接到該 VPS,並將 IPv4 網路流量透過該伺服器發送。此範例並非實際測試報告;下方顯示的公用 IP 位址、金鑰和終端輸出均為佔位符或範例。
此配置為點對點 VPN:一個客戶端連接到一個伺服器。它使用 Debian 自帶的 WireGuard 工具,採用單對等節點、IPv4 轉送和 IPv4 NAT。此設定假設 VPS 具有公網或已連接埠轉送的 IPv4 位址,您可以使用 sudo 對其進行管理,並且可以透過 UDP 連接埠 51820 存取它。本教學不涉及配置路由 IPv6 或 VPS 後端的私有網路。
此範例10.8.0.0/24使用 VPN,10.8.0.1伺服器端和10.8.0.2Maya 的第一個用戶端都配置了 VPN。請使用與用戶端 Wi-Fi、辦公室網路或雲端網路不重疊的子網路。即使握手成功,衝突也可能導致流量走錯路徑。
WireGuard 使用公鑰認證。伺服器需要客戶端的公鑰,客戶端也需要伺服器的公鑰;每個私鑰都保存在其所屬裝置上。 Debian 的 WireGuard 文件介紹了軟體包和對等節點的配置,而 WireGuard 的快速入門指南則介紹了金鑰產生和 keepalive 機制。請參閱Debian WireGuard 文件和WireGuard 快速入門指南。
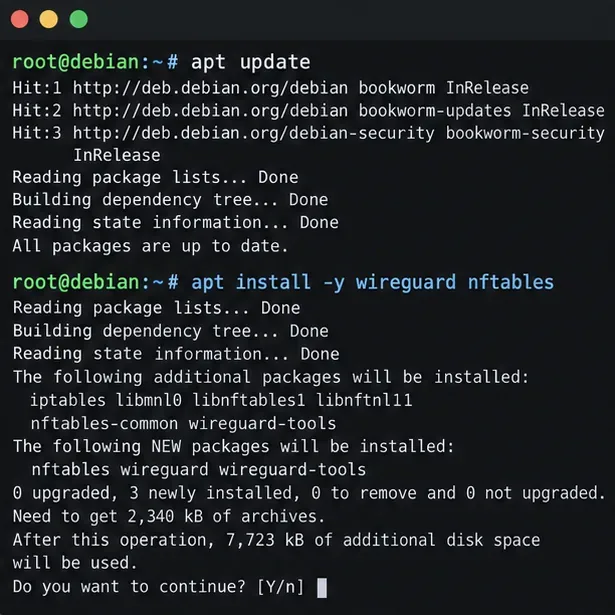
更新軟體包索引並安裝 WireGuard 和 nftables,這將提供範例 IPv4 位址偽裝規則。在 VPS 上執行以下命令:
sudo apt update
sudo apt install wireguard nftables
Debian 透過wireguard元軟體包及其工具打包了 WireGuard。如果伺服器已在使用防火牆管理器(例如 UFW、firewalld 或提供者管理的規則),請在新增任何內容之前確定其活動規則集。請勿使用此範例取代現有的防火牆配置。
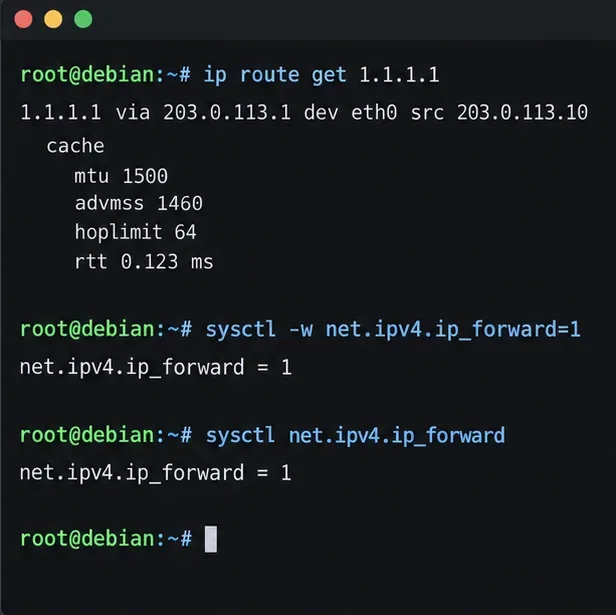
查詢路由表,了解 Debian 使用哪個介面來存取外部 IPv4 位址:
ip route get 1.1.1.1範例中,路由使用 `<route_name> eth0`。您的 VPS 可能顯示不同的名稱,例如ens3`<route_name>` 或 ` enp1s0<route_name>`;稍後在 NAT 規則中使用您輸出的名稱。另請注意伺服器的公網 IPv4 位址或 DNS 名稱。如果伺服器位於路由器之後,請將來自該路由器的 UDP 51820 連接埠轉送至 Debian 主機。
要建立完整的隧道,需要啟用 IPv4 轉送。請立即啟用並使其在重新啟動後仍然有效:
echo 'net.ipv4.ip_forward=1' | sudo tee /etc/sysctl.d/99-wireguard.conf
sudo sysctl --system
sysctl net.ipv4.ip_forward最後一條命令應該會報告結果net.ipv4.ip_forward = 1。此設定允許封包轉送;但它本身並不會開啟防火牆或提供NAT功能。
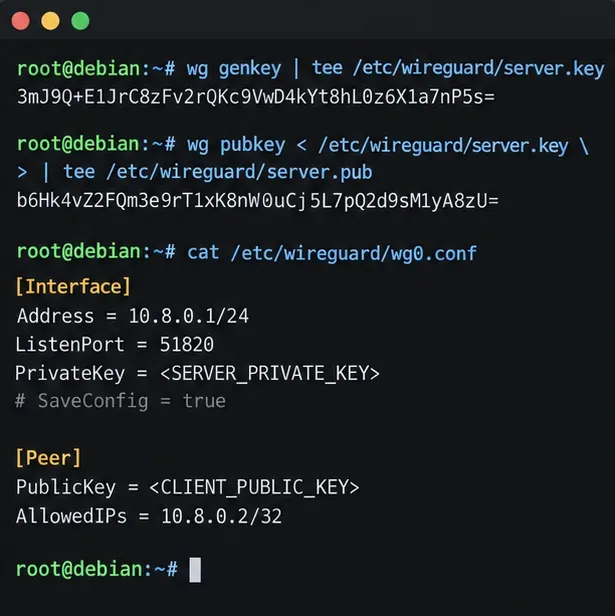
在 Debian 主機上建立伺服器金鑰,並設定嚴格的檔案權限:
sudo install -d -m 700 /etc/wireguard
sudo sh -c 'umask 077; wg genkey > /etc/wireguard/server.key; wg pubkey < /etc/wireguard/server.key > /etc/wireguard/server.pub'盡可能在客戶端設備上產生客戶端金鑰對。在wireguard-tools已安裝以下軟體的 Linux 用戶端上:
umask 077
wg genkey | tee client.key | wg pubkey > client.pub
對於手機,請在官方 WireGuard 應用程式中建立新的隧道,並讓它產生個人資料金鑰。僅將客戶端的公鑰複製到伺服器。務必client.key妥善保管,切勿將其貼到伺服器配置中或在聊天中發送。 Debian Bookwormwg(8)手冊詳細記錄了關鍵命令和介面欄位。
/etc/wireguard/wg0.conf按照以下結構建立密鑰。將每個大寫佔位符替換為對應的真實密鑰。使用 `getServerPrivateKey()` 指令在本機上讀取伺服器私鑰sudo cat /etc/wireguard/server.key;將客戶端公鑰放入 peer 部分。
[Interface]
Address = 10.8.0.1/24
ListenPort = 51820
PrivateKey = SERVER_PRIVATE_KEY

[Peer]
PublicKey = CLIENT_PUBLIC_KEY
AllowedIPs = 10.8.0.2/32
請保護該文件,因為它包含私鑰:
sudo chown root:root /etc/wireguard/wg0.conf
sudo chmod 600 /etc/wireguard/wg0.conf
AllowedIPs = 10.8.0.2/32為該對等方指派一個 VPN 位址,並阻止其他對等方聲明該位址。為每個額外的設備10.8.0.3/32分配單獨的金鑰對和不同的位址,例如 123. ...
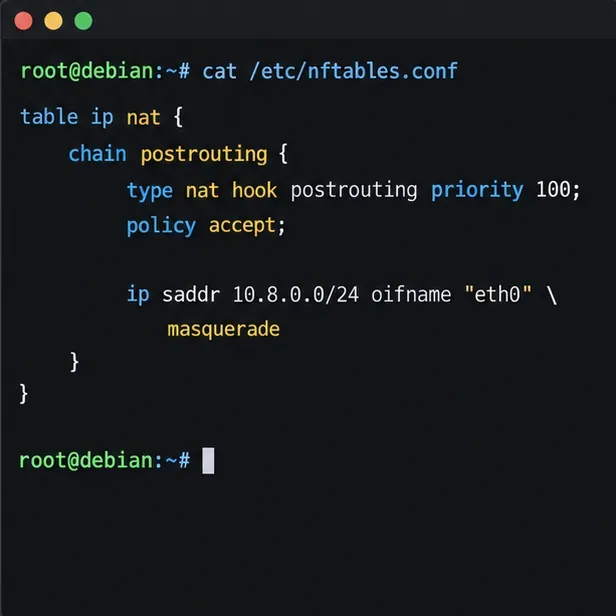
對於範例完整 IPv4 隧道,出站封包10.8.0.0/24必須透過具有來源 NAT 的公網路介面發出。在伺服器現有的 nftables 設定或防火牆管理器中新增對應的規則。以下獨立的 nftables 表示例說明了該規則;請將其替換eth0為步驟 2 中發現的介面:
table ip wg_nat {
  chain postrouting {
    type nat hook postrouting priority srcnat; policy accept;
    ip saddr 10.8.0.0/24 oifname "eth0" masquerade
  }
}
如果您使用 Debian 系統nftables.service,請將 nftables 表合併到服務啟動時載入的設定中,並sudo nft -c -f /etc/nftables.conf在重新載入之前驗證整個檔案。在套用目前配置之前,請檢查該配置是否會重新整理或取代現有規則。 NAT 本身並不能覆寫丟棄流量的轉送鏈策略:請wg0在您的活動防火牆中允許從 WAN 介面轉送流量,並允許回傳流量。 Debiannft(8)手冊中記錄了 nftables 規則載入和 NAT 語句的相關內容。
在VPS提供者防火牆和任何主機防火牆中,允許入站UDP 51820連接埠。不要為該WireGuard隧道開放TCP 51820埠。變更防火牆策略時,請保持SSH存取規則有效;如果防火牆重新啟動導致連線斷開,請使用提供者控制台或其他復原路徑。
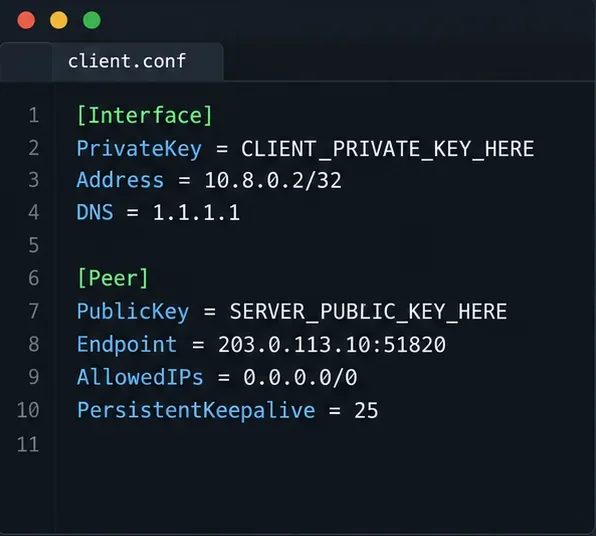
Create a new tunnel in the WireGuard client app, or save a configuration like this on a Linux client. Replace the private key, server public key, and endpoint with real values. The TEST-NET address below is only an example and will not reach a real server.
[Interface]
Address = 10.8.0.2/32
PrivateKey = CLIENT_PRIVATE_KEY
DNS = 1.1.1.1

[Peer]
PublicKey = SERVER_PUBLIC_KEY
Endpoint = 203.0.113.10:51820
AllowedIPs = 0.0.0.0/0
PersistentKeepalive = 25
AllowedIPs = 0.0.0.0/0 routes IPv4 destinations through the tunnel, so it is the full IPv4 tunnel choice. For a narrow split tunnel that reaches only the WireGuard server address, use 10.8.0.0/24 instead. To reach a LAN behind the server, include that LAN’s actual subnet in the client’s AllowedIPs, add a return route or suitable NAT, and allow the traffic through the server firewall; those steps depend on the LAN router and are outside this example.
PersistentKeepalive = 25 can help a client behind NAT remain reachable after idle periods. It is optional; WireGuard’s documentation says most users do not need it, but gives 25 seconds as a broadly useful interval when a NAT mapping must stay open. The DNS field is supported by some clients and clients based on wg-quick; if your app ignores it, set DNS through that app’s own controls.
On Debian, bring the interface up at boot with:
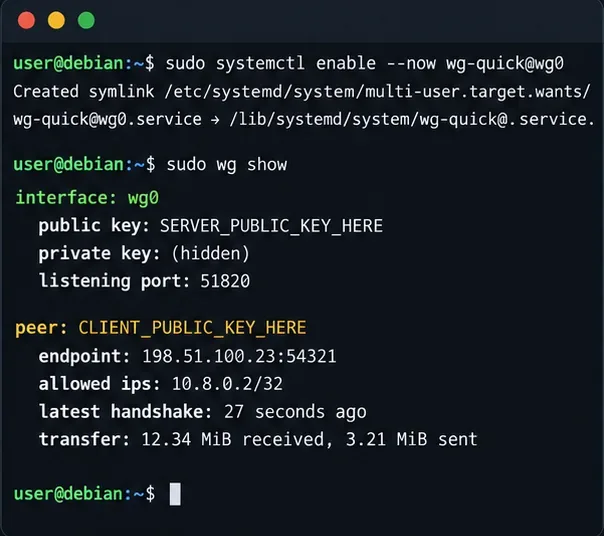
sudo systemctl enable --now wg-quick@wg0
sudo wg show
Import or activate the client profile after UDP 51820 is reachable. In wg show, check that the expected peer appears and that latest handshake updates after the client sends traffic. The wg-quick(8) manual for Debian Bookworm describes the interface setup helper used by the systemd unit.
A missing handshake points first to reachability or key mismatches: confirm the endpoint address and port, UDP firewall rules, server public key in the client profile, client public key in wg0.conf, and correct system time. A handshake without working traffic usually points to forwarding, NAT, route overlap, or a firewall forward-chain rule.
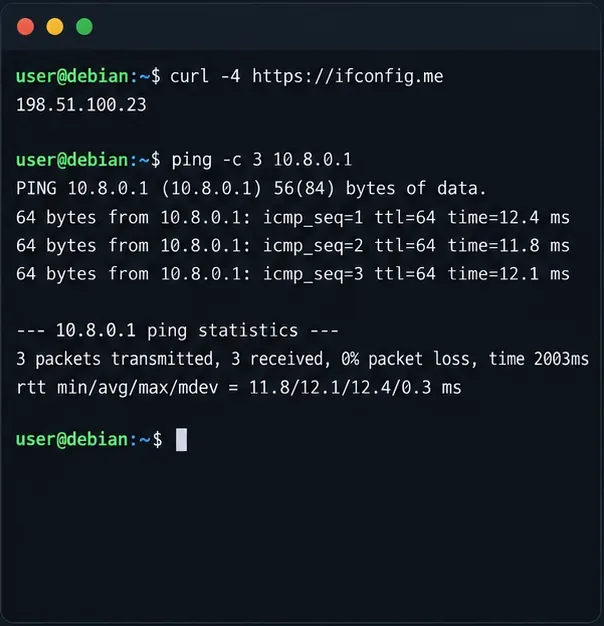
With the client connected, first test the server’s tunnel address, then check the public IPv4 address seen by an external IPv4 address-check service:
ping -c 3 10.8.0.1
curl -4 https://ifconfig.me
The ping should reach the server if ICMP is allowed. The external IPv4 check should show the VPS’s public egress address for this full-tunnel setup. If the public address does not change, inspect AllowedIPs, forwarding, the NAT interface name, and the firewall’s forward policy.
This example is IPv4-only. AllowedIPs = 0.0.0.0/0 does not route IPv6, so a client with IPv6 connectivity may still send IPv6 traffic outside the tunnel. Do not describe this configuration as a complete dual-stack privacy tunnel. To carry IPv6 through WireGuard, allocate and route IPv6 addresses for the tunnel, enable IPv6 forwarding, configure appropriate firewall and routing rules, and add ::/0 on the client only after that path works end to end. Provider support varies. Otherwise, choose a split-tunnel policy knowingly and check the client’s IPv6 behavior.
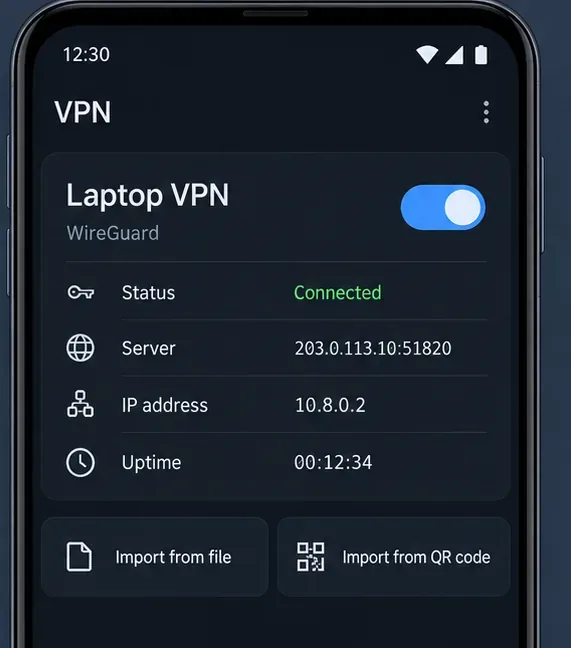
net.ipv4.ip_forward=1, the NAT rule uses the actual egress interface, and the firewall permits forwarded traffic.10.8.0.0/24 overlaps a local or remote network. Renumber the tunnel if needed, updating both peers and the firewall rule together.wg-quick@wg0 is enabled and that the firewall and sysctl settings are persisted through the system’s normal configuration.Before calling the setup complete, verify that the server service is active, wg show reports a recent handshake and increasing transfer counters, the client can reach 10.8.0.1, and an IPv4 egress check reports the server’s public address. Reboot only after persistent firewall and forwarding settings are in place, then repeat those checks. For additional peers, issue separate key pairs and unique tunnel IPs, then remove a device by deleting its peer entry and reloading the interface.
為一個遠端客戶端設定 Debian 12 WireGuard VPN 伺服器。設定金鑰、IPv4 轉送、nftables NAT、防火牆存取和連線檢查。
使用精心設計的 CIS 基準測試工作流程來強化 Debian 12 工作站:選擇正確的設定檔、安全地修補程式、檢查服務和存取權限、設定 nftables 並記錄證據。
診斷 Debian 12 上的 MySQL OOM 崩潰問題,檢查 VPS 記憶體限制,配置交換空間,並調整資料庫記憶體和並發性,但不保證提供通用的解決方案。
學習如何在虛擬機器中建立和測試基於 Debian 的 OSTree 桌面,包括系統樹準備、啟動整合、部署檢查和回滾。
Configure an SSHFS boot mount in Debian with SSH keys, fstab, and systemd automount. Includes reboot checks, permissions, timeouts, and troubleshooting.
2026年10月臺北與新北種植指南:依中央氣象署與農業部資料整理蔬菜、香草、草花、直播、育苗、定植與每週工作,並分清氣候常態與短期預報。
剛接觸播客?了解 2026 年影響影片、發現、文字稿、人工智慧、分析、獲利以及實用啟動計畫的趨勢。
這是一門實用的使用者生成內容 (UGC) 大師班,內容涵蓋客戶和創作者內容的來源、授權、簡報、發布和衡量,同時又不失真實性。
社群建立可以加深信任、提高用戶留存率、收集回饋並增強用戶擁護度,但它並不能取代所有行銷管道。權衡利弊,選擇合適的模式。
Learn what major social platforms have actually confirmed about ranking changes in 2026, what depends on context, and how to adapt without chasing myths.